Build comments section with Next.js and Supabase - Part 3. Update, Delete and Reply
Web
NextJS
Supabase
Jan 26th, 2022
•
12 min read
We'll learn how to update and delete comments, and reply to other comments.
Recap
This is a 3rd part of the Build comments section with Next.js and Supabase series.
Make sure you've finished Part 1 and Part 2.
In the last post we created two features - creating and reading comments.
In this chapter we will update, delete and reply our comments. It won't be too different from the last time! The follow-along code can be found here.
Update and Delete Comments
Plan a feature
We make mistakes, especially a lot when we write something in the internet.
That's why there's always a Edit and Delete section in posts and comment section in Facebook, Medium, Twitter and etc.
A properly working editing feature should have these features:
- Able to edit the payload(content) right at the comment item itself.
- Disable edit button unless payload hasn't changed.
- Indicate if this comment has been edited.
A great deleting feature should:
- Ask user if they're really gonna delete this to prevent if this was a click mistake.
- Then delete it.
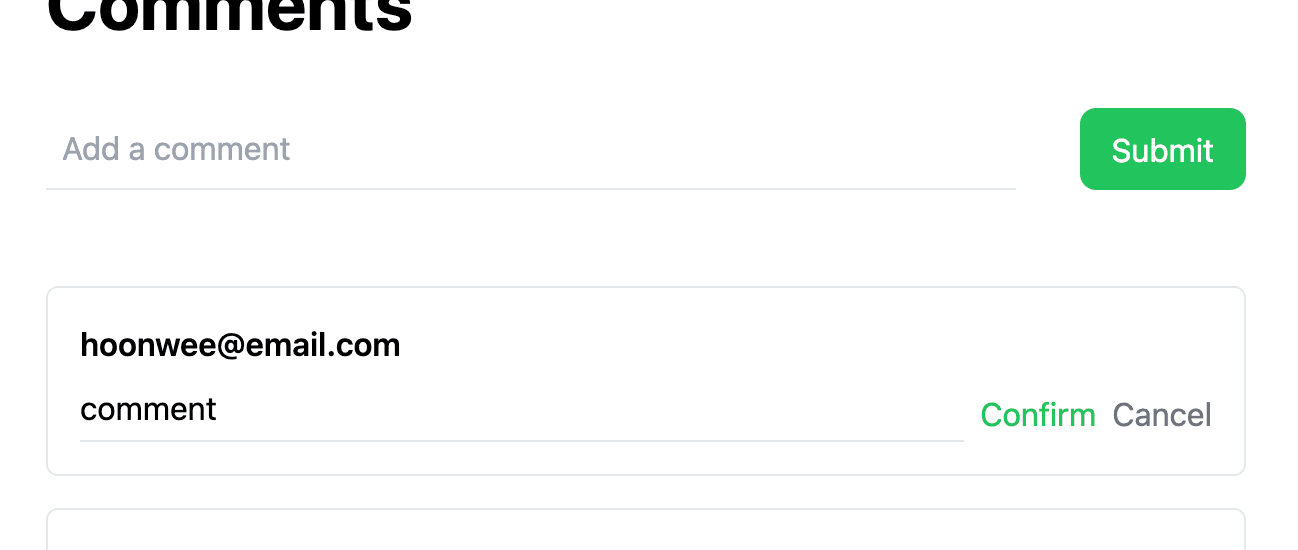
Create edit input form
For the best user experience, the input form to edit the comment should not be the same place where you add a comment but the comment list item itself. That means we should upgrade our comment list item, so let's add the following code to do it!
...

const Home: NextPage = () => {
  const [comment, setComment] = useState<string>("");
  const [commentList, setCommentList] = useState<CommentParams[]>([]);
  const [editComment, setEditComment] = useState<EditCommentParams>({
    id: "",
    payload: "",
  });

  const onChangeEditComment = (event: ChangeEvent<HTMLInputElement>) => {
    const payload = event.target.value;
    setEditComment({ ...editComment, payload });
  };

  const confirmEdit = () => {
    window.alert("Confirm edit comment");
  };

  const getCommentList = async () => {
    const { data, error } = await supabase.from("comments").select("*");

...
        <div key={comment.id} className="border rounded-md p-4">
          <p className="font-semibold mb-2">{comment.username}</p>
          <div className="flex items-center gap-2 justify-between">
            {comment.id === editComment.id ? (
              <input
                type="text"
                value={editComment.payload}
                onChange={onChangeEditComment}
                className="pb-1 border-b w-full"
              />
            ) : (
              <p className="font-light">{comment.payload}</p>
            )}
            {editComment.id === comment.id ? (
              <div className="flex gap-2">
                <button type="button" onClick={confirmEdit} className="text-green-500">
                  Confirm
                </button>
                <button
                  type="button"
                  onClick={() => setEditComment({ id: "", payload: "" })}
                  className="text-gray-500"
                >
                  Cancel
                </button>
              </div>
            ) : (
              <button
                type="button"
                onClick={() => setEditComment({ id: comment.id, payload: comment.payload })}
                className="text-green-500"
              >
                Edit
              </button>
            )}
          </div>
        </div>
      ))}
    </div>

...
A brief analysis for this one:
- We added
editCommentstate, which will set which comment to edit and to what payload it should be. - We added two functions:
onChangeEditComment: This will watch the value of edit form input and set the payload to edit withsetEditComment.confirmEdit: This will send a request to Supabase to update the comment, but right now we just put silly window alert.
- We updated our comment item section to switch between 'read-mode' and 'edit-mode' with
editCommentstate.
If you want, add more code to cancel editing when clicking other place.
Constructing update request
Now only thing to do is just replacing the confirmEdit function to communicate with Supabase.
Replace that part with this code. I'm sure you are now getting familiar with supabase api.
...

   const confirmEdit = async () => {
    const { data, error } = await supabase
      .from("comments")
      .update({
        payload: editComment.payload,
      })
      .match({ id: editComment.id });
    if (!error && data) {
      window.alert("Edited Comment!");
    } else {
      window.alert(error?.message);
    }
  };

...
So apparently from this code,
- We used
updatefunction to update the data.- We only need to pass the changed part, not the whole other parts.
- Then used
matchfunction to target which comments should be updated.
But wait, shouldn't we update the updated_at?
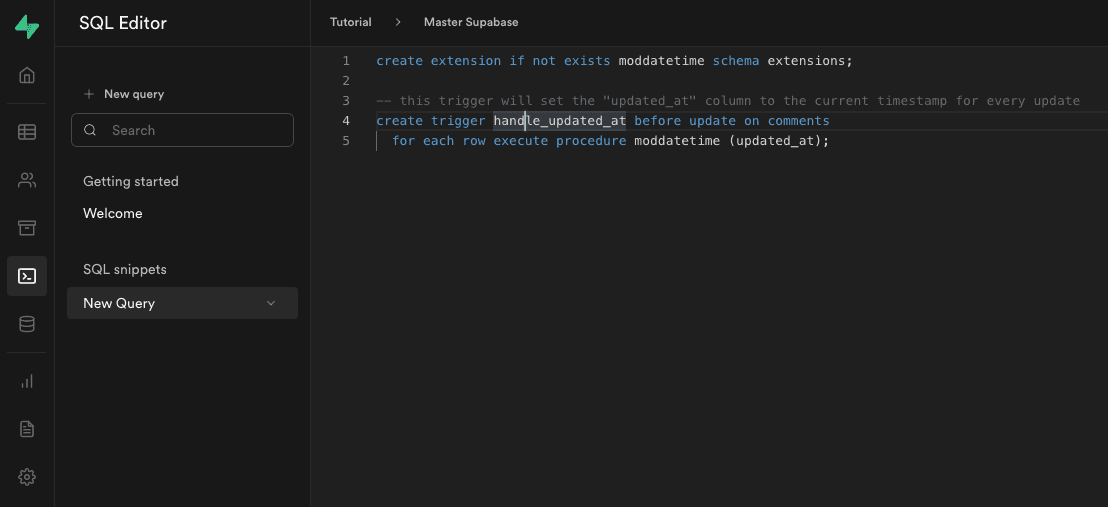
That is correct! We will do it in Supabase Dashboard, not in our Next.js code. We will use an actual SQL query to accomplish this, and to do that head to SQL Editor through navigation bar. Then you'll see an input box to write down the SQL query. Insert the SQL query down below.
create extension if not exists moddatetime schema extensions;

create trigger handle_updated_at before update on comments
  for each row execute procedure moddatetime (updated_at);
So much to explain about this query, but basically it will set the updated_at column to the current timestamp for every update.
Hit Run to run the query and adapt the trigger.
Using SQL editor, we can take maximum power out of Supabase!
Now our edit request will work like a charm. Try editing any comment, and then refresh. If succeeded then you'll see your comment edited.
Disable Confirm button when comment is not edited
Currently we just allow user to click Confirm button whenever they press Edit button, without checking if the payload has changed.
This can arise two problems:
- Our
confirmEditfunction always changesupdated_atdata, so even though we've mistakenly confirm the edit without changing, the comment will always be marked aseditedsince there's no going back in time. - Now this is not that critical matter, but if we were to use this in much bigger project, then there will be unnecessary transaction between user browser and Supabase.
To prevent this, we need to disable the Confirm button when user hasn't change their comment. Let's tweek a code a little bit.
...

    {editComment.id === comment.id ? (
      <>
        <button
          type="button"
          onClick={confirmEdit}
          disabled={editComment.payload === comment.payload}
          className={`${editComment.payload === comment.payload ? `text-gray-300` : `text-green-500`}`}
        >
          Confirm
        </button>
        <button
          type="button"
          onClick={() => setEditComment({ id: "", payload: "" })}
          className="text-gray-500"

...
Now our Confirm button will be disabled unless the content of the comment has been changed.
This prevents our service from sending unnecessary update event.
Indicate edited
Comment item should indicate that it has been edited. This can be acheived quite easily - by comparing created_at and updated_at.
...

      .map((comment) => (
        <div key={comment.id} className="border rounded-md p-4">
          <p className="font-semibold mb-2">
            {comment.username}
            {comment.updated_at !== comment.created_at && (
              <span className="ml-4 text-sm italic font-extralight">edited</span>
            )}
          </p>
          <div className="flex items-center gap-2 justify-between">
            {comment.id === editComment.id ? (

...
Now if we edit any comment, it will indicate edited in extra-light & italic font.
Delete comment
Deleting comment is not so different from updating comment - it uses same match function to target which comment should
be deleted. Let's do this real quick.
...

  const confirmDelete = async (id: string) => {
    const ok = window.confirm("Delete comment?");
    if (ok) {
      const { data, error } = await supabase.from("comments").delete().match({ id });
      if (!error && data) {
        window.alert("Deleted Comment :)");
      } else {
        window.alert(error?.message);
      }
    }
  };

...

                  onChange={onChangeEditComment}
                  className="pb-1 border-b w-full"
                />
              ) : (
                <p className="font-light">{comment.payload}</p>
              )}
              <div className="flex gap-2">
                {editComment.id === comment.id ? (
                  <>
                    <button type="button" onClick={confirmEdit} className="text-green-500">
                      Confirm
                    </button>
                    <button
                      type="button"
                      onClick={() => setEditComment({ id: "", payload: "" })}
                      className="text-gray-500"
                    >
                      Cancel
                    </button>
                  </>
                ) : (
                  <>
                    <button
                      type="button"
                      onClick={() => setEditComment({ id: comment.id, payload: comment.payload })}
                      className="text-green-500"
                    >
                      Edit
                    </button>
                    <button type="button" onClick={() => confirmDelete(comment.id)} className="text-gray-700">
                      Delete
                    </button>
                  </>
                )}
              </div>
            </div>
          </div>
        ))}
      </div>
    </div>

...
After adding the code, click the Delete button in the comment item that you want to delete, press Ok in confirm window,
and refresh the page - then the comment is gone!
You see, making CRUD feature with Supabase is Supa-easy!
Replying to Comments
How our reply will work
Now guess the only column in our table that we haven't used yet - that's right, the reply_of column. We'll use it right away to
add a feature to reply comments.
Let's think how our reply feature would work best:
- User clicks
Replybutton on the comment item. - Then our input form(for adding comments) will show that this comment will be a replying comment of some other comment.
- Once added and fetched to the comment list, it should still be distinguishable from normal comments.
Adding Reply of: ....
Alrighty, as always let's work with the UI part first.
...

  const [editComment, setEditComment] = useState<EditCommentParams>({ id: "", payload: "" });
  const [replyOf, setReplyOf] = useState<string | null>(null);

  const onChangeEditComment = (event: ChangeEvent<HTMLInputElement>) => {

...

    <h1 className="text-4xl font-bold ">Comments</h1>
    <form onSubmit={onSubmit} className="mt-8 flex gap-8">
      <div className="w-full">
      {replyOf && (
        <div className="flex gap-4 my-2 items-center justify-start">
          <p className="text-xs font-extralight italic text-gray-600">
            Reply of: {commentList.find((comment) => comment.id === replyOf)?.payload ?? ""}
          </p>
          <button onClick={() => setReplyOf(null)} className="text-xs font-light text-red-600">
            Cancel
          </button>
        </div>
      )}

...

    .map((comment) => (
      <div key={comment.id} className="border rounded-md p-4">
        {comment.reply_of &&
          <p className="font-extralight italic text-gray-600 text-xs">
            Reply of: {commentList.find((c) => c.id === comment.reply_of)?.payload ?? ""}
          </p>
        }
        <p className="font-semibold mb-2">
          {comment.username}

...

            Delete
          </button>
          <button type="button" onClick={() => setReplyOf(comment.id)} className="text-orange-500">
            Reply
          </button>
        </>
      )}
    </div>

...
Here in this code, we can see that:
- We declared a new state called
replyOfto save the id of replying comment that we select. - We added a single text line in (1) Input form (2) Above username in comment item, showing which comment we are replying to.
- In input form, we also added a
Cancelbutton to cancel replying to it and revert our input form to normal one.
- In input form, we also added a
- We added a
Replybutton, which will usesetReplyOfto save the id of comment that we select.
Ok this explanation enough, but basically it will look like this simple.
Replying to myself - feel free to change username if you want :)
Then all you need to add is to pass the replying comment's id to reply_of field in onSubmit.
...

  const onSubmit = async (event: FormEvent<HTMLFormElement>) => {
    event.preventDefault();
    const { data, error } = await supabase.from("comments").insert({
      username: "hoonwee@email.com",
      payload: comment,
      reply_of: replyOf,
    });
    if (!error && data) {
      window.alert("Hooray!");
    } else {
      window.alert(error?.message);
    }
  };

...
Now try adding a replying comment and then refresh. If done correctly, you'll see a reply comment like the image below.
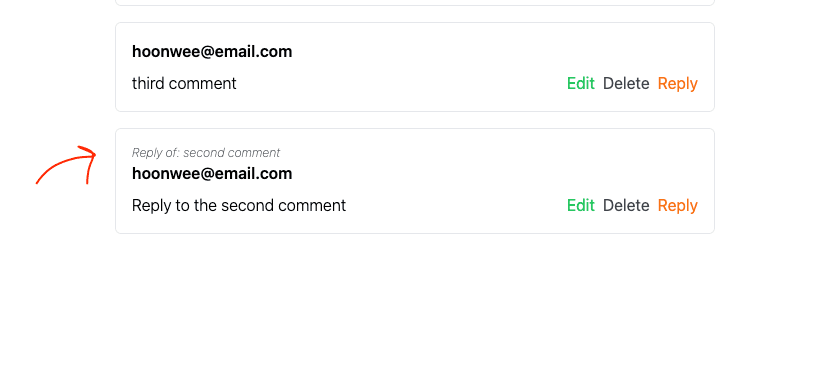
Try replying to a reply comments!
Restyling using Icons
Problems with text-only UI
So now our comment section is already awesome. It can read, create, update, delete and reply to comments. While it's fully functional, we have to admit that it looks very boring and visually unapealing - because we only used texts for our UI.
The problem with using only text for our UI can invoke bad user experiences like:
- It can be less intuitive, which will confuse users.
- If the text is too long, it can ruin the overall visual design.
So to solve this, we need some design element that can pack the meaning of the UI into strong and concise visual format. The best one for this, as far as I know, is an icon.
Text → Icons
There are tons of icon packs in internet, and in here we will use one called Hero icons. Since it's been developed from the people behind TailwindCSS, it works best with our project.
Install Hero icons with the following command.
$ yarn add @heroicons/react
Now let's start replacing several texts into Hero icons!
...

import { ReplyIcon, PencilIcon, TrashIcon, CheckCircleIcon, XCircleIcon, XIcon } from "@heroicons/react/outline";

...

          Cancel
        </button>
      </>
    ) : (
      <>
        <button
          onClick={() => setEditComment({ id: comment.id, payload: comment.payload })}
          title="Edit comment"
        >
          <PencilIcon className="w-6" />
        </button>
        <button onClick={() => confirmDelete(comment.id)} title="Delete comment">
          <TrashIcon className="w-6" />
        </button>
        <button onClick={() => setReplyOf(comment.id)} title="Reply to comment">
          <ReplyIcon className="w-6 rotate-180" />
        </button>
      </>
    )}
  </div>

...
What has been changed?
- We replaced three texts in our comment item -
Edit,Delete, andReply. - We removed the unnecessary color variation between buttons cause our icons already are distinguishable.
- We added a
titleproperty to show what this icon means when user's mouse pointer hovers on the button.- I strongly advice to do this, since the infographic that we know as common sense might not be the same in other culture.
- We rotated the
Replyicon to 180 degrees. I did it because it felt right with this angle, but you can change it if you want.
Let's keep adding more icons.
...

      {replyOf && (
        <div className="flex gap-4 my-2 items-center justify-start">
          <div className="flex items-center justify-start gap-2">
            <ReplyIcon className="w-4 text-gray-600 rotate-180" />
            <p className="font-extralight italic text-gray-600 text-sm">
              {commentList.find((comment) => comment.id === replyOf)?.payload ?? ""}
            </p>
          </div>
          <button onClick={() => setReplyOf(null)} title="Cancel">
            <XIcon className="w-4 text-gray-600" />
          </button>
        </div>
      )}

...

      {comment.reply_of && (
        <div className="flex items-center justify-start gap-2">
          <ReplyIcon className="w-3 text-gray-600 rotate-180" />
          <p className="font-extralight italic text-gray-600 text-xs">
            {commentList.find((c) => c.id === comment.reply_of)?.payload ?? ""}
          </p>
        </div>
      )}

...

      <div className="flex gap-2">
        {editComment.id === comment.id ? (
          <>
            <button
              type="button"
              onClick={confirmEdit}
              disabled={editComment.payload === comment.payload}
              title="Confirm"
            >
              <CheckCircleIcon
                className={`${
                  editComment.payload === comment.payload ? `text-gray-300` : `text-green-500`
                } w-6`}
              />
            </button>
            <button type="button" onClick={() => setEditComment({ id: "", payload: "" })} title="Cancel">
              <XCircleIcon className="w-6 text-gray-600" />
            </button>
          </>
        ) : (
          <>

...
We've changed Reply of to our Reply icon, and changed Confirm and Cancel too.
We didn't change much, but looks way better!
If you think there's too less texts, than you can revert some of them. It's completely up to you!
Summary
Now to summarize what we've done so far:
- Created
update,deleteandreplyfeatures - Restyled the UI with icons
We now have an awesome comment section that has all the CRUD features ... but there still one problem with it.
Everytime we mutate our comments table data, we need to refetch from the Supabase server. To acheive this what we've done
so far was to just press Refresh button, which can be bad for user experience.
To fix this, in the next post we will modify the local cache using SWR. It's gonna be very interesting part, so you'd better be ready for it!
Until then, Happy coding folks!
•
•
•
Comments
Sign in to add comments
Sign in